CORIOmaster & CORIOgrapher Help
Creating and editing custom resolutions
You can use CORIOdiscover to create and save up to 10 custom resolutions to use on your CORIOmaster™. Custom resolutions are for both inputs and outputs. You can get the specific values for creating a custom resolution from the manufacturer of your source or display.
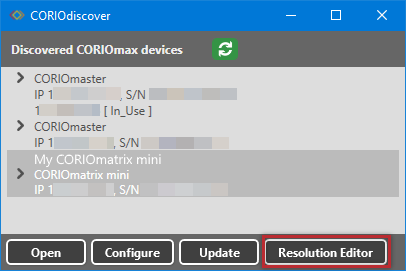
View standard resolutions and create custom resolutions in the resolution editor of CORIOdiscover. Open CORIOdiscover, select your device, and then select Resolution Editor.
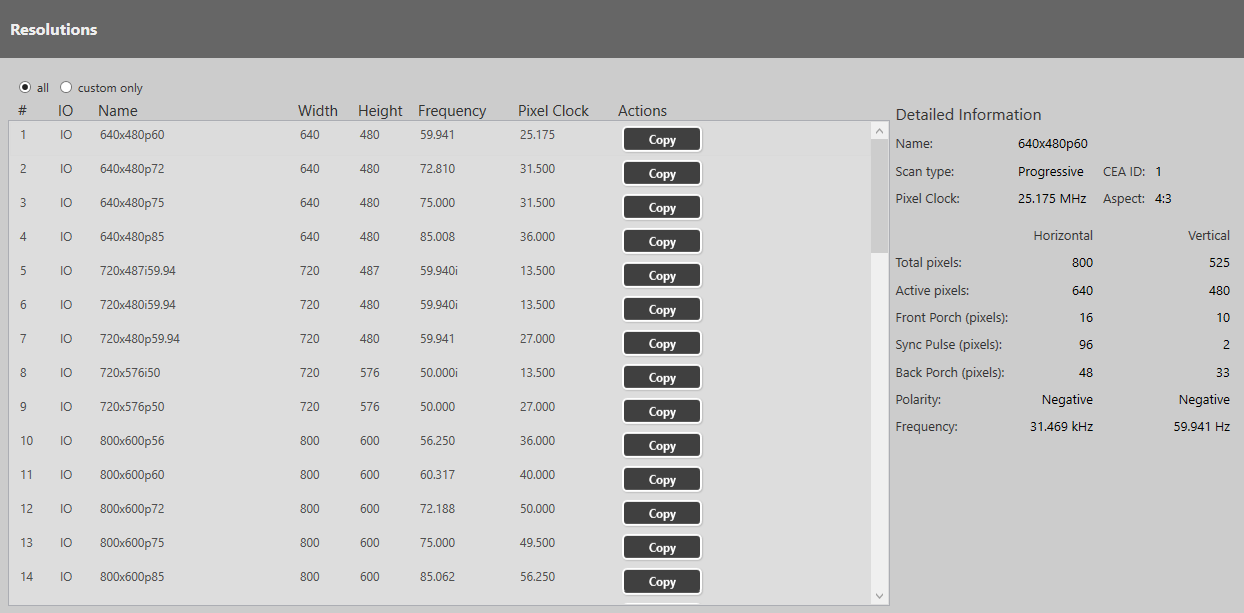
Select a resolution to see detailed information on the right-hand side.
Guidelines for all custom resolutions
- All numeric values are in pixels, unless otherwise stated.
- All numeric values are positive integers, or zero.
- String values may not contain spaces.
- String values may only be valid, printable ASCII characters.
- Strings have a limited number of characters.
For resolutions with HActive up to and including 1920 pixels, the pixel clock must be between 13.5 MHz and 162 MHz.
- You can have also have a pixel clock of 297 MHz, on the HDMI output module only.
- The value for active video cannot be zero.
- The maximum size for a resolution created for a DVI module is 1920x1200 @60 Hz.
Supported video standards
- VESA CVT
- CEA-861-D
- VESA DMT
Not supported
You can't create custom resolutions for SDI sources or displays.
Guidelines for 4K custom resolutions
If the HActive value is not divisible by 64, you cannot rotate the output.
The maximum values for a 4K custom resolution are:
HActive = 3840
VActive = 2528
Pixel clock = 297 MHz
Supported values for pixel clocks, for the HDMI output module, for resolutions with HActive > 1920:
27 MHz
74.175824 MHz
74.25 MHz
148.351648 MHz
148.5 MHz
260 MHz
296.703296 MHz
297 MHz
If the pixel clock your source or display is within 0.0001 MHz of a value in this list, it might work, depending on your other settings. If you can't see anything on your display, try using the exact values given here.
Guidelines for interlaced custom resolutions
- The vertical front and back porches must be twice the even field.
- The vertical sync pulse must be twice the even value.
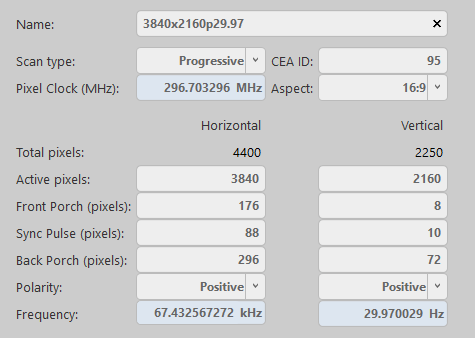
When you create a custom resolution, you need to enter values for the following options. The values come from the manufacturer of your source or display.
Option | Notes | |||||||||
|---|---|---|---|---|---|---|---|---|---|---|
Name | Enter a useful name for your resolution. General naming rulesNote: it is possible to create more than one custom resolution with the same name. Check the list of custom resolutions available from Resolutions. Names:
Best practice naming rulesFor best results, use the name format below: [width]x[height][scantype][rate][optional] Where:
| |||||||||
Scan type | Choose between progressive and interlaced scanning. | |||||||||
CEA ID | Only enter a value when you define a custom resolution that complies with the CEA-861-D profile for that value. The CEA identifier information option (CEA ID) does not affect the custom resolution. It is there for providing information on the resolution to any connected equipment. If you enter a value for CEA ID and your custom resolution does not conform to the CEA format for that value, you might not see an image on your display. | |||||||||
Pixel Clock | Enter a value between 13.5 and 162 MHz, or, for 4K resolutions, see the guidelines for 4K custom resolutions. If the specification of your source or display does not include a value for pixel clock, set the vertical and horizontal frequency instead. See below. | |||||||||
Aspect | If you are creating a custom resolution for a CORIOmatrix or CORIOmatrix mini, select an aspect ratio from the list. Choose from:
| |||||||||
Active pixels | Enter a number of pixels between 64 and 3840 to set the width of the visible image. Enter a number of pixels between 64 and 2528 to set the height of the visible image. | |||||||||
Front Porch | The front porch is the gap between the end of the active video and the start of the sync pulse, in pixels. Enter a number of pixels between 1 and 2000 to set the horizontal and vertical front porch. | |||||||||
Sync Pulse | The sync pulse identifies the start of each row or frame of video. Enter a number of pixels between 8 and 500 to set the horizontal sync pulse. Enter a number of pixels between 10 and 100 to set the vertical sync pulse. | |||||||||
Back Porch | The back porch is the gap between the end of the sync pulse and the start of the active video, in pixels. Enter a number of pixels between 1 and 2000 to set the horizontal back porch. Enter a number of pixels between 1 and 100 to set the vertical back porch. | |||||||||
Polarity | The sync pulse separates the video fields into positive and negative polarity. Choose between positive and negative. | |||||||||
Frequency | You only need to enter values here if the specification for your source or display specification does not include a value for pixel clock. Enter a value in kHz to set the horizontal frequency, and a value in Hz to set the vertical frequency. |
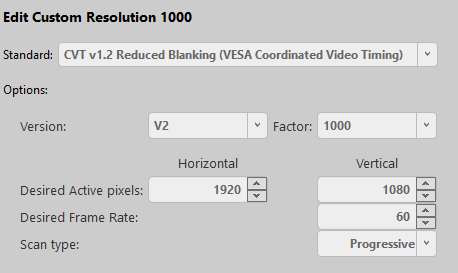
Options for custom resolutions based on the VESA CVT standard
Option | Notes |
|---|---|
Version | Enter the version number of the VESA CVT standard you want to use. |
Factor | The factor converts from an exact frame rate into an NTSC-compatible vertical frequency. Choose between 1000 and 1001.
Select 1000 to make the vertical frequency the same as your desired frame rate. Select 1001 if you need a vertical frame rate that does not exactly match your desired frame rate. For example, select 1001 if your desired frame rate is 60, but you need a vertical frequency of 59.94. |
Desired Active pixels | Enter a number of pixels to set the width and height of the displayed area. The highest resolution we support is 1920x1200p60, with reduced blanking. See the VESA standard for other CVT standard resolutions. |
Desired Frame Rate | Enter a frame rate in Hz. |
Select your device, and then select Resolution Editor.
Enter your administrator username and password.
The default username is admin, and the default password is adminpw.
Select custom only.
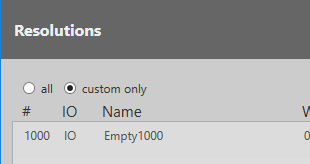
- Find an empty custom slot, or choose a custom resolution to edit, and then select Edit.
- Enter a useful name for your custom resolution.
Enter values for any other options as needed.
Creating a custom resolution from the CEA-861-D or VESA DMT standard
- From Resolutions, find an empty custom slot, or choose a custom resolution to edit, and then select Edit.
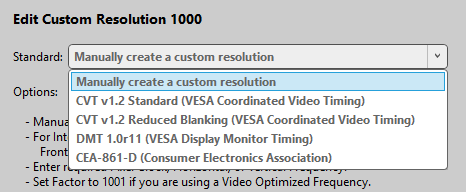
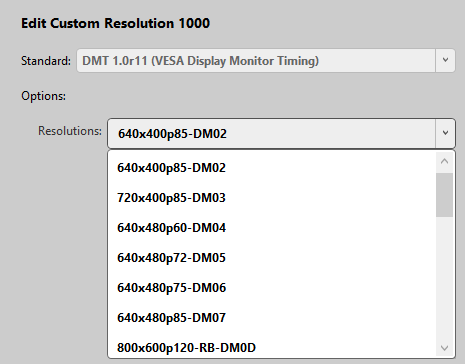
Select your standard from the list.
Select a resolution from the list.
Enter a useful name for your custom resolution.
Enter values for any other available options as needed.
Creating a custom resolution from the VESA CVT standard
- From Resolutions, find an empty custom slot, or choose a custom resolution to edit, and then select Edit.
Select your standard from the list.
Enter a useful name for your custom resolution.
Enter values for any other available options as needed.
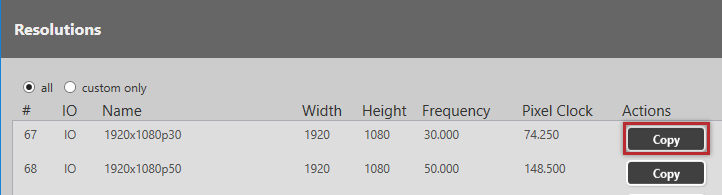
If you want to create a custom resolution that is only slightly different to a standard resolution, you can copy the closest resolution and then edit it.
CORIOdiscover saves the new custom resolution in the first available empty slot. If there are no empty slots available, choose which custom resolution to overwrite.
From Resolutions, find the resolution closest to the resolution you want, and select Copy.
Edit your new custom resolution.
You can't delete a custom resolution, but you can return it to factory default settings, which removes your custom settings.
From Resolutions, find the custom resolution you want to delete, and select Reset.